
Converting an Old Cabinet into a TV stand
- Brandon Khan
- Dec 8, 2020
- 3 min read
Updated: Dec 27, 2020
Repurposing "junk" is a good way to reuse materials, reduce cost and avoid unnecessary landfill usage.
So for this project I decided to turn an old cabinet we had lying around into a TV stand for the basement.

The first stretch was to disassemble the old cabinet into its pieces which we can refurnish and reuse.


Putting Stuff Together
From then, it was a lot of cutting, clamping and drilling. The wood from the cabinet only accounted for roughly 75% of the wood used, the remainder came from scrap wood I had laying around. The entirety of the stand is made of maple wood.


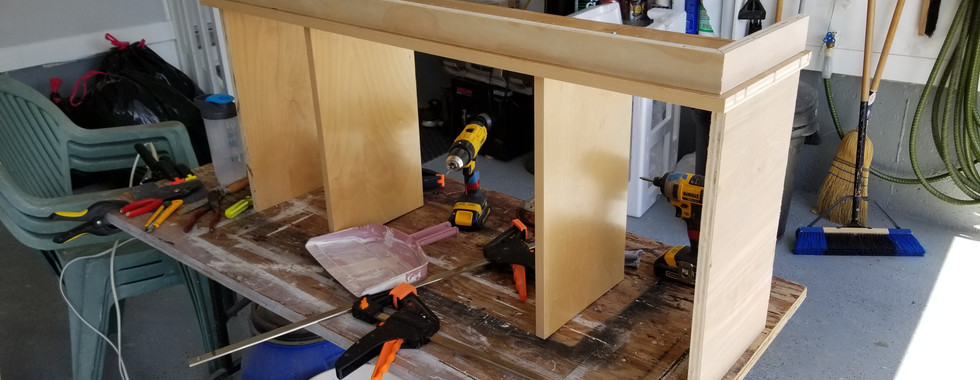


Here was a preliminary construction of what the stand will look like (minus the shelves and the doors)

The fun part was creating the hybrid shaker-barn doors, just to give it a rustic look. It was made using maple wood and was built using a traditional shaker door approach with 1/8" backing for the middle piece. A table saw made the channels in the top and side pieces to fit the middle portion in.


I created the "X" using 1/8" maple backing. To avoid wasting time, the geometry was more eyeballing it than trying to figure out exact angles. It worked just as well and because it is a barn door style so a bit of imperfection is fitting.


Next, I made the holes for the shelf pins


A nice clean sand using 220 grit paper gave the stand a solid consistency in color & texture while giving it a clean look

Wood Finishes
Once all the major sub-components were sanded, I applied a coat of wood stain conditioner to prep it for staining. Wood conditioner is used to make sure an even stain look is achieved and prevent splotchy or blemishing effects due to the grain of the wood.


Grey oil-base Varathane stain was applied to make the first coat.


Applying the second coat I found unusual. This specific stain didn't take the second time around and I felt it was remaining on top of the wood as opposed to absorbing into the wood. That is why you see bleeding of the original maple through the stain. While it does give it a charming look it wasn't exactly what I had in mind. Nonetheless I then applied a single coat of clear-satin Varathane as the finish.


My Opinion
While many carpenters highly suggest using the wood conditioner (I being one of them), for this type of "reclaimed" wood finish I would recommend forgoing the wood conditioner. It made it difficult for this specific color of stain to be absorbed and because we are going for a rustic look, a bit of inconsistently in color saturation is more than acceptable
Final Assembly
After just applying a clear coat of Varathane on the top part, I affixed it to the rest of the standing using L-brackets. The 1/2" strip of wood clamped to the side was used to ensure a consistent lip of the surface over the gables.


Using a 1 3/8-inch forstner bit I made the holes in the door for the hinges and then installed the door onto the stand.


The door handles were then added and voila! The TV is completed!


The Finished Product


The setup is complete! For a stand that only cost me $20 I can't complain, it fits the space and the TV plus all the accessories

The Total Cost:
Stain = $10
Door Handles = $10
Total = $ 20
Comments